
How to Repair a Torn Crawl Space Vapor Barrier
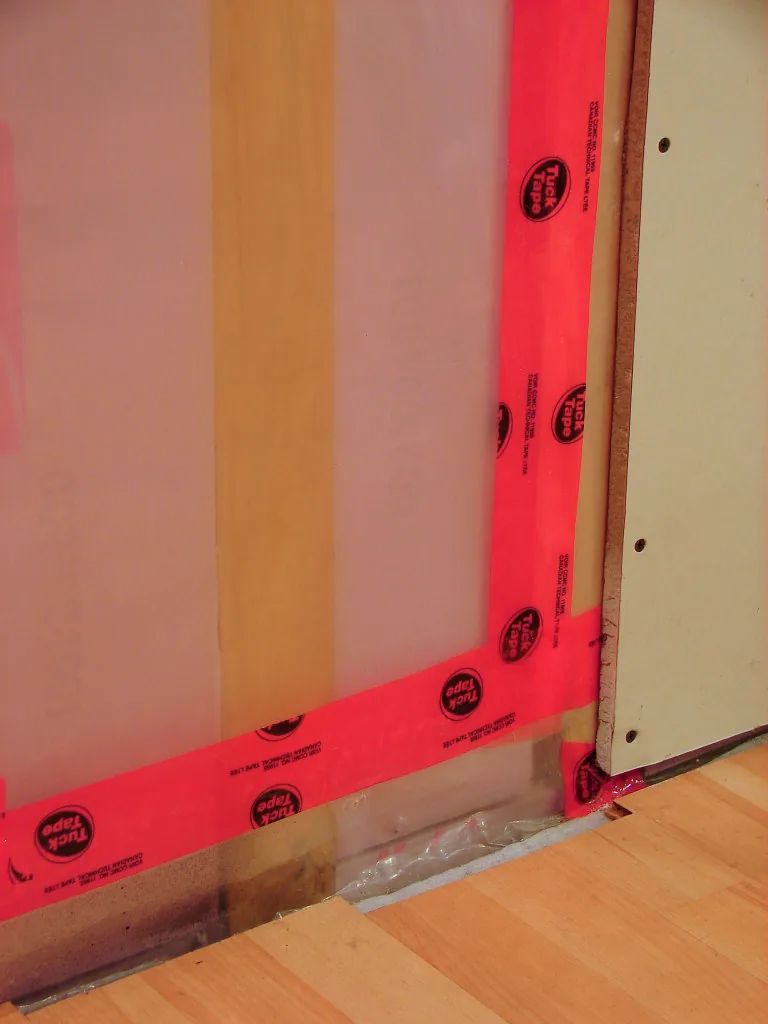

A torn crawl space vapor barrier—ground vapor retarder or liner—is often a do-it-yourself patch or seam reseal if the sheet is otherwise sound and the crawl is dry and safe to enter. For mil ratings, full installs, and barrier costs, see the Crawl Space Vapor Barrier Guide. For standing water, start with Water in the Crawl Space: Causes and Fixes.
Check your liner maker’s instructions for the tape or sealant that suits your sheet.
Safety first — stop before you tape
Don’t treat tape as a fix for water, sewage, mold, or pests.
| Stop | What to do |
|---|---|
| Standing water, sewage, contaminated floodwater | Stay out of the hazard; start with Water in the Crawl Space: Causes and Fixes |
| Visible mold on liner, wood, or insulation | Moisture first and protective-gear limits—see Crawl Space Mold: What Homeowners Should Do |
| Entry gear, confined low-clearance common sense, “tell someone your plan” | Inspection entry themes on the Crawl Space Inspection Checklist |
| Suspected vermiculite or asbestos-containing material in the crawl | The U.S. Environmental Protection Agency says assume asbestos-contaminated vermiculite may be present in attic or wall products; don’t disturb it. If it needs to be removed, use a trained professional. Hire a professional asbestos contractor if remodel or renovation would disturb it. Apply the same rules if vermiculite or other suspected asbestos-containing material appears in a crawl. See the inspection checklist. |
| Soft framing, active pests chewing new holes, bulk drainage failure | Pro path—see When Not to Encapsulate a Crawl Space, Water in the Crawl Space: Causes and Fixes, and How to Hire and Compare Crawl Space Contractors |
For protective gear, the Building America Solution Center do-it-yourself guide lists inspection examples such as coveralls with a hood, a fitted half-mask respirator and safety glasses or a full-face respirator, gloves, kneepads, and a headlamp—detail and timing on the inspection checklist. Don’t work alone if you can avoid it.
Patch versus replace
| Situation | Lean toward |
|---|---|
| Few small holes or slices; liner still flexible; seams mostly intact; crawl dry | Patch or re-tape |
| Brittle, UV-chalked, or shredding sheet; widespread punctures; wrong tape that won’t stick; chronic wear from walking and storage | Replace the ground cover—materials and install quality on the vapor barrier guide |
| Tear is only a symptom of water, pests, or stored items dragged across the liner you haven’t fixed | Fix the cause first, then decide patch versus replace |
Manufacturer install guidance states that when the wrap is damaged during or after installation, repairs should be made—then shows small-hole tape and larger-hole patch sequences. That’s a repair pathway, not a promise that every failed sheet is worth saving. Material selection and full-replacement scope stay on the vapor barrier guide.
Materials
Use products compatible with your existing liner, following that liner’s manufacturer. Educational types that appear in manufacturer install docs and Department of Energy and Building America practice:
- Compatible seam or repair tape sized for the hole (examples in manufacturer literature include dedicated crawl or vapor-barrier seaming tape and wider repair tape).
- Matching polyethylene or liner patch cut from the same class of ground-cover sheet for larger holes.
- Durable sealant compatible with the retarder (mastic or acoustical sealant at edges and supports; unvented-crawl practice seals seams and penetrations).
- Clean cloth; optional firm roller or flashing tool for tape pressure.
If the tape on the sheet won’t stick after cleaning, wrong adhesive chemistry is a common failure mode—follow the liner maker’s tape specification rather than whatever roll is in the garage.
Overlap and seal rules
| Source | Overlap or tear rule | Role |
|---|---|---|
| International Residential Code | Joints of the vapor retarder overlap 6 inches and are sealed or taped; edges extend at least 6 inches up the stem wall and are attached or sealed | Common code minimum |
| Department of Energy weatherization job aid | Overlap seams at least 12 inches (reverse-shingle or upslope lap); tape seams; seal edges and penetrations; at least 6-inch upturns; at least 6-mil or perm 0.1 or less for new material | Weatherization practice |
| Building America Solution Center conversion checklist | Minimum 6-mil poly; lap 6 to 12 inches; all seams and any tears or holes shall be taped; at least 6-inch upturns taped to walls or footings after clearing organics | Building America checklist practice |
| Building America water-management guide | Seams overlapped 6 to 12 inches and taped | Building America water-management practice |
| Manufacturer install examples | Small hole: center compatible tape over the damage after cleaning. Larger hole: liner patch with at least 6 inches overlap in all directions, then tape all edges. Some under-slab or gas-barrier install guides use 12-inch-wide repair tape centered on small holes—follow your product’s document | Manufacturer installation practice |
Match the rule to its source, then satisfy your local building department and your liner’s instructions.
Do-it-yourself repair steps
0. Confirm the crawl is safe and dry enough to work
Clear stored items enough to reach the damage. Stop if you find water, sewage, asbestos-containing material, or unsafe access.
1. Clean the adhesion area
Clean adhesion areas of dust, dirt, moisture, and frost before tape or patch. Dirty or wet plastic is why “repairs” peel in a week.
2. Small hole or slice — tape repair
After cleaning, center compatible tape over the damage and press to seal. Another manufacturer example uses a length of wide repair or seaming tape centered on a small hole and pressed to seal—use the tape your liner maker specifies.
3. Larger hole — liner patch plus tape
Cut matching liner that covers the damage by a minimum 6 inches in all directions; center it; tape all edges with compatible tape. That geometry is an install example—not a substitute for International Residential Code or Department of Energy seam overlaps on a full new install.
4. Open or failed seams — re-lap and seal
Overlap the new piece at least 6 inches, which is the common code minimum. Weatherization practice from the U.S. Department of Energy calls for 12 inches, and the Building America Solution Center uses 6 to 12. On sloping ground, use reverse or upslope lap where that technique applies. Then tape the seams, secure as needed, and seal edges to foundation or supports with mastic or acoustical sealant.
5. Penetrations (pipes, piers)
Manufacturer install examples document single-penetration detail patches or boots. One documented sequence: cut a detail patch or boot with about 6 inches overlap on the edges around the void at the base of the penetration; a single straight cut from the edge to the center may be needed; then tape the patch sides and around the penetration with compatible tape. Another documented sequence: fabricate a square large enough to overlap 12 inches in all directions, fit it at the pipe or boot, and seal with the product’s tape or butyl sequences (or center 12-inch seaming or repair tape over a cut, 6 inches on either side). Keep the ground sheet from defeating drainage patterns.
6. Re-secure upturns if loose
International Residential Code pathways, the Department of Energy job aid, and Building America all expect vertical turns and attachment or seal at walls or footings (heights: at least 6 inches in common code and Department of Energy practice; Building America water-management text also discusses 8 to 12 inch upturns—treat as guide language, confirm with your local building department and your install design). Re-tape loose top edges after cleaning the wall contact band.
After you patch
- Walk carefully or visually scan for other tears—pest paths and stored items dragged across the liner often leave more than one.
- Keep sharp storage and scrap off the liner surface.
- If moisture returns under or on the sheet, the water path is unsolved—return to Water in the Crawl Space: Causes and Fixes, not thicker tape.
- For a full re-liner, mil choice, and sourced barrier costs, see the vapor barrier guide and the Crawl Space Encapsulation Cost Guide.
- For the encapsulation process sequence, see Crawl Space Encapsulation Process: Step by Step.
The bottom line
Clean the area, close small cuts with compatible tape, and close larger holes with a matching liner patch that overlaps the damage on all sides before taping the edges—following your manufacturer’s install sheet. Keep overlap rules labeled by source (International Residential Code minimum versus Department of Energy job-aid practice versus Building America checklist) and never tape over an unsolved water or contamination problem. Replace a failed sheet via the vapor barrier guide when patching would be lipstick on brittle plastic.
Sources
- Install or Repair a Crawl Space Vapor Retarder — U.S. Department of Energy
- Vented to Unvented Crawl Space — Building America Solution Center
- Water Management for an Existing Crawlspace Floor — Building America Solution Center
- IRC 2021 R408.3 Unvented Crawl Space — published International Residential Code text (Texas adoption example)
- StegoCrawl Detailed Installation Instructions — Stego Industries
- Installation Guidelines – With VaporSeal Tape — Viaflex
- Look at the Crawlspace for Moisture Issues — Building America Solution Center
- Protect Your Family from Asbestos-Contaminated Vermiculite Insulation — U.S. Environmental Protection Agency
Image credits
- ‘Vapour barrier’ by P199 via Wikimedia Commons, CC0, resized and converted to WebP.