
Crawl Space Drainage and Waterproofing Guide
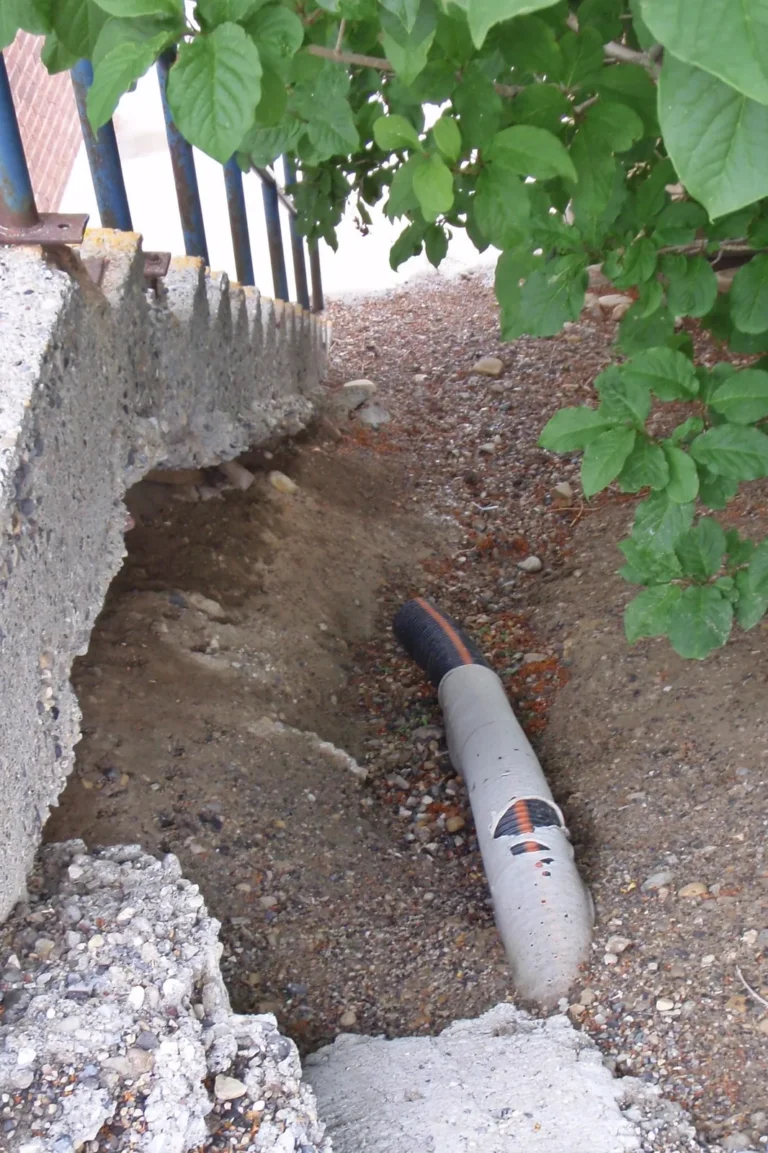

Keeping liquid water out of the crawl is what makes every durable under-floor assembly work. Vapor retarders and encapsulation packages manage vapor and air—they don’t replace grading, gutters, footing drains, wall waterproofing, or a working sump when groundwater rises. Surface water, subsurface drain tile, dampproofing or waterproofing, drainage mats, interior perimeter drains, and sumps have to work together—and they come before encapsulation.
If you already see puddles, start with Water in the Crawl Space: Causes and Fixes for safety and cause spotting, then come back for longer-term drainage choices. For what a sump install or replacement typically costs, see Crawl Space Sump Pump Cost. Before you seal over water, read When Not to Encapsulate a Crawl Space.
Why liquid water beats vapor control
The Building America Solution Center’s guide on water management for existing crawl floors opens with a hard rule: treat bulk drainage and site moisture before you seal and insulate. Researchers at Oak Ridge National Laboratory make the same ranking in the Building Foundations Handbook: surface drainage first, then subsurface drainage, then waterproofing on the wall—vapor control comes later. A practical order of work:
- Move surface water away from the foundation.
- Collect groundwater at the footing with perimeter drains, and send it to daylight, a drywell, an approved storm sewer, or a sump.
- Add wall dampproofing or waterproofing and a drainage layer as needed.
- Use interior collection and a sump where gravity outfall isn’t available.
- Add a ground vapor retarder and a closed-crawl package—see the Crawl Space Vapor Barrier Guide and the Crawl Space Encapsulation Guide—only after liquid water is under control.
How the layers fit together
| Layer | Role | Typical components |
|---|---|---|
| Surface | Keep roof and yard water from soaking the backfill | Grade slope; gutters and downspouts; slabs and drives that fall away |
| Subsurface | Intercept groundwater at the footing | Perforated drain tile in washed gravel and filter fabric; daylight or sump |
| Wall defense | Slow capillary and vapor moisture, or resist hydrostatic water | Dampproofing or waterproofing; drainage mat or free-draining backfill |
| Interior collection | Collect what still arrives; pump it out | Interior perimeter drain; sump basin, pump, discharge, check valve, cover |
| Floor capillary break | Limit soil moisture into the crawl air | Ground vapor retarder or liner |
Surface water management
The Oak Ridge National Laboratory foundations handbook puts it plainly: keep water away from the foundation by sloping the ground and using gutters and downspouts for roof drainage. For grading specifics when puddles are already showing, Water in the Crawl Space: Causes and Fixes covers cause spotting and safety.
Building America Solution Center guidance for existing crawls mirrors the same checklist: re-grade away from the structure; fix gutters and downspouts; make sure patios, walks, and drives slope away—or add drains, for example at the base of a down-sloping driveway. Your local grading rules and soil still govern.
Footing and perimeter drain tile
The Building America Solution Center’s footing drain guidance recommends:
- Install perforated drain pipe along the exterior or interior of basement or crawl footings, sitting outside of—not on top of—the footings and below the bottom of the slab or crawl floor.
- Slope to a non-perforated leader that discharges to daylight, a drywell, an approved storm sewer, or a sump. Daylight discharge is commonly described as at least 10 feet from the foundation.
- Set the pipe in washed gravel: at least 6 inches of half-inch to three-quarter-inch washed gravel or stone above the pipe and at least 2 inches below, as framed in common residential code and ENERGY STAR practice. Confirm what your local building department requires.
- Wrap the gravel bed—or a fabric-sock pipe—with landscape or filter fabric to limit silt clogging. Alternates include fabric-sock drain pipe or code-approved composite foundation drainage systems.
ENERGY STAR water-management practice for basements and crawls calls for drain tile with the top of the pipe below the bottom of the slab or crawl floor; at least 6 inches of half-inch to three-quarter-inch washed gravel fully wrapped in fabric; level or sloped to daylight or a sump; and a channel through the footing when tile sits on the interior side.
For crawls with a floor below surrounding grade, the Oak Ridge National Laboratory best-practice sketch describes dual independent perforated loops—inside and outside the footing—draining separately to daylight or an internal sump as the robust option. A single exterior loop is presented where site drainage is already good. Researchers there also note that ducts through the footing for sub-slab drainage can affect subslab radon depressurization—coordinate if radon systems are planned.
Before excavating for missing or clogged exterior tile, Building America guidance recommends confirming gutters, plumbing leaks, wall cracks, final grade, and slab slopes. Excavation to the footing is labor-intensive; if walls will be open, waterproofing, insulation, and drainage-plane materials can be added in the same dig. Field sizing of the pipe still follows the designer and your local building department.
Dampproofing versus waterproofing
Oak Ridge National Laboratory drainage guidance draws a bright line—don’t blur it:
| Dampproofing | Waterproofing | |
|---|---|---|
| What it resists | Vapor and capillary moisture | Liquid water under hydrostatic pressure |
| How it’s typically used | Often a dampproof coating plus a polyethylene layer to cut vapor and capillary draw through the wall | Needed when water problems or poor drainage are expected; when the crawl is storage or mechanical space; or when intermittent hydrostatic pressure occurs from rain, irrigation, or snowmelt |
| Limitation | Not effective against hydrostatic water through the wall | Best practice on most sites that aren’t very dry, per that handbook |
Except on very dry sites, that handbook generally recommends waterproofing as best practice for below-grade walls. Where the crawl floor could sit below the water table, it recommends considering slab-on-grade instead of a below-water-table crawl.
How model codes draw the same line
The International Residential Code draws the same bright line: dampproofing for typical earth-retaining foundation walls that enclose below-grade interior spaces and floors, and waterproofing when a high water table or other severe soil-water conditions are known. Those provisions apply to foundation walls that retain earth and enclose interior spaces and floors below grade—not to every crawl configuration. Open pier-and-beam or other assemblies without earth-retaining walls enclosing below-grade interior space sit outside that trigger. One short check with your local building department confirms what your area actually enforces.
Drainage mats versus interior liners
Exterior drainage mats—dimple board or drainage board—sit over a waterproofing membrane so groundwater can move down the wall face to the footing drain instead of pressing on the wall. The Building America Solution Center recommends free-draining soil or a geotextile or dimpled plastic drain mat on the exterior of the foundation wall, plus horizontal drainage with an exterior footing drain—especially important where frost heave is a concern—and shows rigid foam installed over a waterproofing membrane. That assembly is a drainage plane feeding the footing drain, not a replacement for the drain.
An interior ground vapor retarder or crawl liner is a floor capillary break. See the Crawl Space Vapor Barrier Guide. It isn’t a substitute for exterior waterproofing or drain tile. When water still arrives after exterior work, Building America guidance recommends interior collection to a sump as the way to remove what reaches the crawl. That still doesn’t mean you can skip grade, gutters, and exterior tile.
Interior drains and sump pumps
When gravity outfall isn’t available, an interior perimeter drain and sump collect water that still arrives. Building America water-management guidance for existing crawls describes a plastic sump pit often about 2 to 3 feet deep and perforated so rising groundwater is removed before it reaches the crawl floor, with gasketed, tight-fitting lids. Related points from that drain and sump guidance:
- Install the pump, wiring, and discharge pipe with a check valve; cover with a gasketed, airtight cover.
- Connect the pit to the perimeter drain or sub-slab gravel field with a perforated liner or through-footing pipes.
- An uncovered sump can allow soil gases—including radon, water vapor, and other soil gases—into the home. Cover it for indoor-air reasons as well as splash control.
- ENERGY STAR practice calls for a sump pit cover that’s mechanically attached with a full gasket seal or equivalent.
Building America’s pre-retrofit assessment notes add practical retrofit tips: grade the crawl floor with at least a 3% slope toward a low-spot collector that feeds the sump; install battery backup for the pump where the water table is high or power loss is a risk; and keep a tight-fitting gasketed lid. Closed-crawl practice also includes dampproofing or waterproofing the exterior wall when the crawl floor sits below surrounding grade, foundation drains, backflow protection on crawl drains, a check valve on the sump outflow, and a water alarm so you know when water arrives.
Pump capacity in gallons per minute or horsepower is a field decision for your installer. See Crawl Space Sump Pump Cost for published national price ranges, and the Crawl Space Sump Pump Guide for how the mechanical pieces fit together.
Conversion and flood openings
Before converting a vented crawl toward a closed or conditioned package, confirm foundation drainage and dampproofing or waterproofing, and add perimeter drainage when the crawl sits below surrounding grade—control bulk water first. Flood-opening sizing and National Flood Insurance Program details are a separate topic. The Federal Emergency Management Agency publishes flood-opening guidance worth reading when openings are part of the picture. For the systems comparison of vented and closed crawls, see Vented vs Unvented Crawl Space.
Drainage before encapsulation
Only after liquid water is controlled does a ground vapor retarder and closed-crawl package make sense. Pair the Crawl Space Encapsulation Guide with When Not to Encapsulate a Crawl Space before anyone seals. Encapsulation doesn’t replace grading, gutters, footing drains, wall waterproofing, or a working sump.
Safety first
Excavation to the footing, structural wall repair, electrical work at pumps, radon coordination, and floodplain compliance need licensed professionals and your local building or floodplain officials. Call an electrician for wet equipment and a structural engineer when walls, piers, or floors show movement or distress.
The bottom line
Keep surface water away, collect what reaches the footing, choose dampproofing or waterproofing for the wall risk you actually have, then manage leftovers with interior drains and a covered sump—and only then close the crawl with vapor control and encapsulation. If you already see puddles, sort safety and causes first, then choose the drainage system that fits the site.
Sources
- Water Management of Existing Crawlspace Floor — Building America Solution Center
- Footing Drain Pipe — Building America Solution Center
- Drain or Sump Pump Installed in Basements or Crawlspaces — Building America Solution Center
- Pre-Retrofit Assessment of Crawlspaces and Basements — Building America Solution Center
- Air Sealed, Insulated Basements — Building America Solution Center
- National Water Management System Builder Requirements (Rev. 13) — ENERGY STAR
- Building Foundations Handbook — Drainage and Waterproofing — Oak Ridge National Laboratory
- Chapter 4 Foundations — Texas IRC 2021 (R406.1 / R406.2) — published International Residential Code text (Texas adoption example)
- Closed Crawl Spaces: An Introduction for the Southeast — Advanced Energy
- NFIP Technical Bulletin 1 (March 2020) — Federal Emergency Management Agency
Image credits
- ‘Downspout seepage’ by Sergei S. Scurfield via Wikimedia Commons, CC BY-SA 3.0, resized and converted to WebP.